Does your outdoor space feel drab and not all that fun to be in? Outdoor spaces can transform from boring to beautiful with a pergola. Not only do pergolas provide helpful shade while adding functionality to an outdoor design, but they can also increase your property value. At Patio Covers Unlimited, your local experts in custom pergola construction, we want you to get the most out of your investment. Today, we are providing you with a detailed breakdown of the pergola construction process, so that you can fully understand what to expect when planning a custom pergola installation.
Step 1: Planning and Designing Your Pergola Construction Project

Do you have a vision of your future pergola? Do you have a Pinterest board of ideas or a sketched-out idea you can’t wait to share? Luckily, the first step in your pergola construction project is to determine the initial design, including position, size, style, and materials.
Position
The position of your pergola construction will either be freestanding or attached. As the name suggests, a freestanding pergola is an independent structure, not connected to any other building. Therefore, it can be placed anywhere on the property, either as a focal point or as a complementing element.
An attached pergola, as its name suggests as well, is connected to a pre-existing structure. Typically attached to a home’s deck or patio, it extends the functionality of your home living space, creating a seamless transition from inside the house to outside.
Determining where to install your pergola will depend heavily on your available space, the size of the structure you desire, and how you want to utilize the new space.
Size
The next consideration to take into account is sizing. Common pergola sizes are the 12×16, 12×20, and 10×10. The easiest way to determine the sizing is to evaluate the space available in your preferred pergola position – often that will set the sizing for you. However, to give you an idea of the various sizes, here is what we commonly suggest:
- A compact patio: 9×9
- A small to medium-sized deck: 10×10 feet
- A large deck: 16×16 feet
- A freestanding pergola: 10×13 feet
- A grand, open space: 12×20
Style
The next determining factor is style. Custom pergola construction lets you get just about any style you desire. The style components will include: post type, column type, beam type, rafter type, lattice knit width, and color. We suggest taking into consideration the existing aesthetics of your home and basing the style of your custom pergola construction to complement your current design.
Materials
Finally, material selection. The most common options for custom pergola construction are wood, aluminum, vinyl, or composite. Each material has its own pros and cons in terms of budget, aesthetics, durability, and maintenance. We suggest talking with your designer about the pros and cons of each, but we will say that we almost always recommend homeowners in the PNW to go with aluminum pergolas!
Step 2: Checking Local Regulations and Permits Required
The next step in your custom pergola construction project is reviewing local regulations and the permits required. Not only does this verify what is and is not allowed, but it prevents legal issues and guarantees that your construction is done to code for your region.
Unfortunately, this can be a little confusing for those who do not traverse this industry every day. That’s why hiring a professional to install your pergola construction is vital, as they are knowledgeable about local regulations, can easily pull the required permits, and can provide advice on how to navigate HOAs.
For example, here at Patio Covers Unlimited NW, our team is well-versed in the regulations and permitting required for the homes and businesses we serve in Yakima, Walla Walla, Tri-Cities, WA, and NE, Oregon. We help guide our customers through the process, handling the legwork so that they can rest easy for the rest of the project!
For a detailed explanation, click HERE!
Step 3: Preparing the Site for Custom Pergola Construction
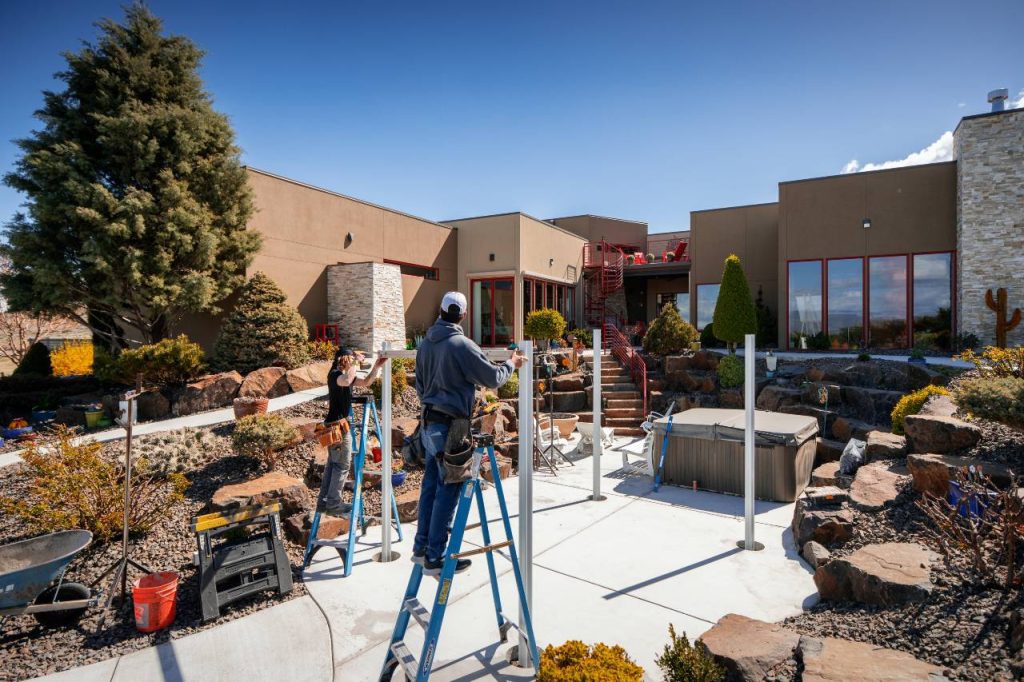
Once the design is complete and the permits are pulled, it is time to prepare the site for your custom pergola construction. To do this, your installation crew will clear the area where the pergola will be built and mark its perimeter. They will also identify any underground utilities to be careful to work around, including sprinkler systems, plumbing pipes, electrical systems, etc.
As a homeowner, before the crew starts, we suggest removing any debris, plants, furniture, or other items in the designated area to speed up the process and protect personal belongings. Additionally, if you know where your underground utilities are, marking them with flags will be helpful for the installation team.
Step 4: Setting the Posts and Framing
Next, it is time to set the posts and framing. The posts will be positioned evenly according to the schematics of the design. Your team will then verify the structural stability and leveling measurements before securing the posts using concrete footings or anchored bases.
Keep in mind that if you are building on dirt or grass, it may be necessary to grade the area or dig holes for the posts. However, if the installers are placing the pergola on concrete, they will simply anchor the pergola posts to the existing surface.
Then, your team will assemble the beams, rafters, and cross supports for durability. Through proper spacing and reinforcement, they will ensure its structural integrity.
Step 5: Roofing and Finishing Touches
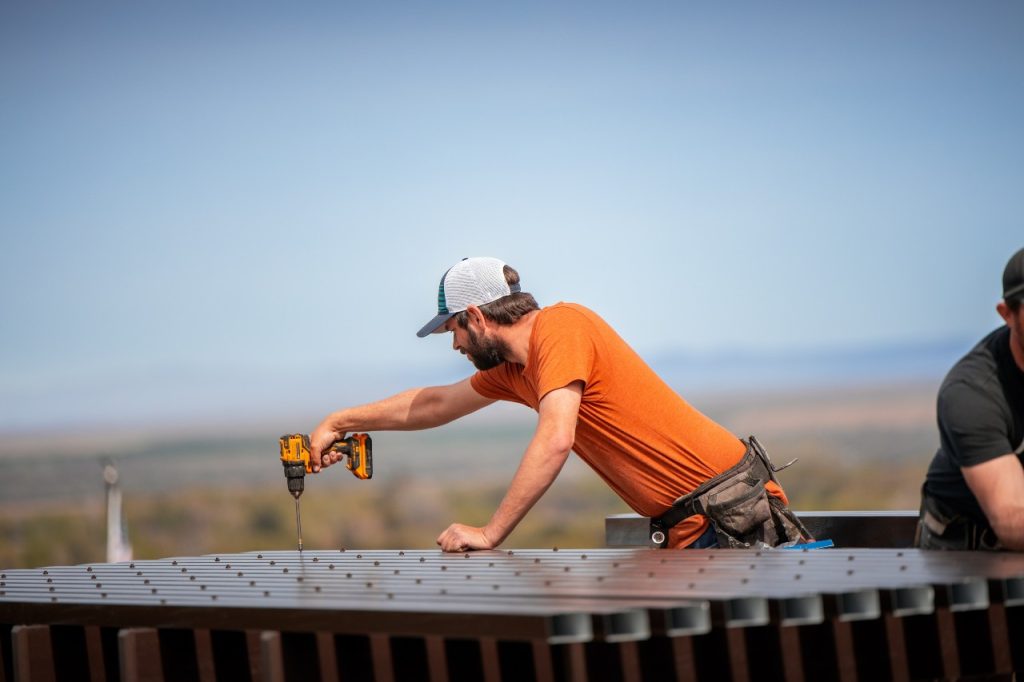
Next up will be the roofing and final touches. Depending on the design you have chosen, your pergola roof will be open lattice, solid roof, or retractable covers. However, prior to this addition to your structure, your installation team will add any additional elements like fans or lighting, so that the wires can be hidden within the roofing, rather than hanging across it. Once those touches are in place, the roof will go up!
After the installation is complete, if you have chosen wood as your material, your team will go about staining, sealing, or painting your new pergola construction for longevity and weather resistance. This step will not be necessary if you have chosen aluminum, vinyl, or composite.
Step 6: Final Inspection and Maintenance Tips
The final step in a successful custom pergola is the final inspection! Your team will carefully review your project to ensure stability and that it meets compliance with building codes. Should there be any issues, they will make the necessary adjustments.
Once it has the gold star of approval, your team will excitedly present it to you! Not only will they walk you through the functionality of your pergola, such as how to operate a retractable cover, lights, fans, or any other element, but they will also walk you through post-construction maintenance.
Post-construction maintenance, depending on the design of your pergola construction, may necessitate seasonal inspections, protective coatings, or regular cleanings. For example, if you went with a wood pergola construction, you will be required to regularly sand, stain, paint, and reseal your pergola to ensure it is protected from pests and inclement weather.
However, suppose you went with our recommended aluminum pergola material. In that case, you will enjoy a maintenance-free pergola, as they will not crack, warp, split, chip, peel, chalk, or fade, even under perpetual wind and UV exposure. All they need is an occasional bath with soap and water to keep them clean and presentable!
Why Choose Patio Covers Unlimited NW for Your Pergola Project?
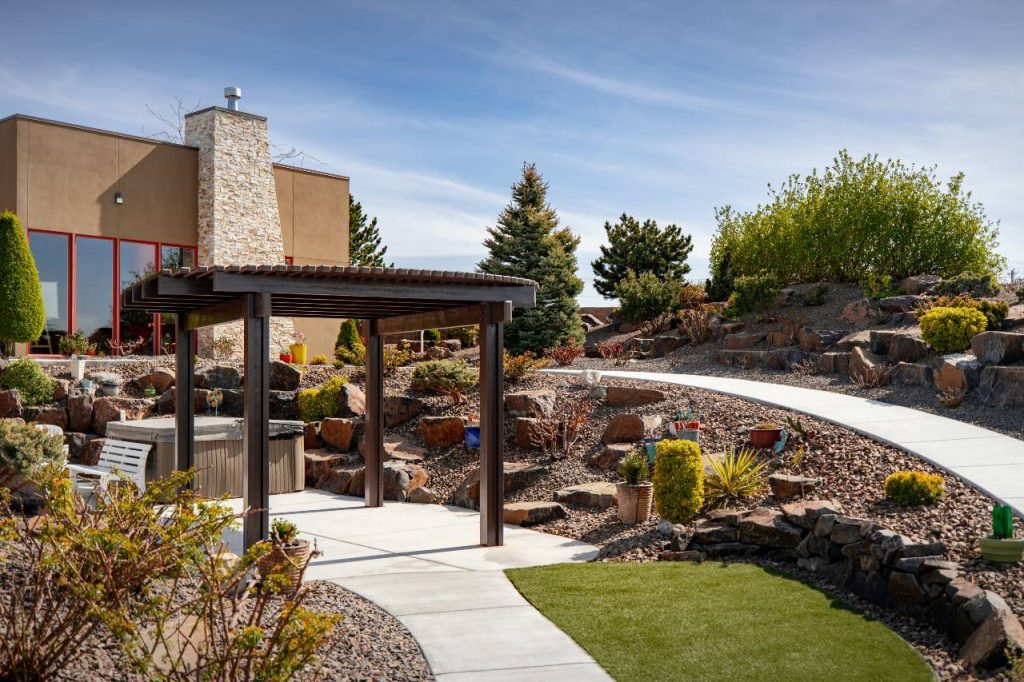
At Patio Covers Unlimited NW, we’ve helped hundreds of families in the Tri-Cities area transform their ordinary outdoor space into a shaded, welcoming retreat customized to their unique needs and preferences. Whether you want to host sports-themed outdoor barbeques, play memorable outdoor games with your kiddos, or take a break from the hustle and bustle of the world, we’ve got you covered (literally).
Our pergolas consist of high-grade aluminum embossed with a wood grain texture that is practically maintenance-free! Our pergola selection is entirely customizable. They come in multiple colors with various post and column types, as well as a variety of beams and rafter ends to choose from. You can also select how tightly knit the lattice will be. We offer a wider pattern for those who want more sun to shine through and a tighter pattern for those who wish to experience less sun.
To get started with our services at Patio Covers Unlimited NW is easy! All you need to do is fill out our contact form and schedule your free consultation with us. We will happily take you through how our successful custom pergola construction process works and provide suggestions for designs and materials based on the unique needs of your space and your preferences. So, whether you want to upgrade your outdoor living space or invest in your home’s long-term property value, we are here to help!
Ready to enhance your outdoor space with a custom pergola? Contact Patio Covers Unlimited NW today for expert installation and a free consultation!

